
Start in three steps
Send a temperature target to a virtual environment sensor and verify the device response through your MQTT broker.
Before you start: Install SPX with the MQTT package and SPX UI. Have a running MQTT broker and an MQTT client. This guide uses the library’s environment sensor model.
1. Create a virtual sensor
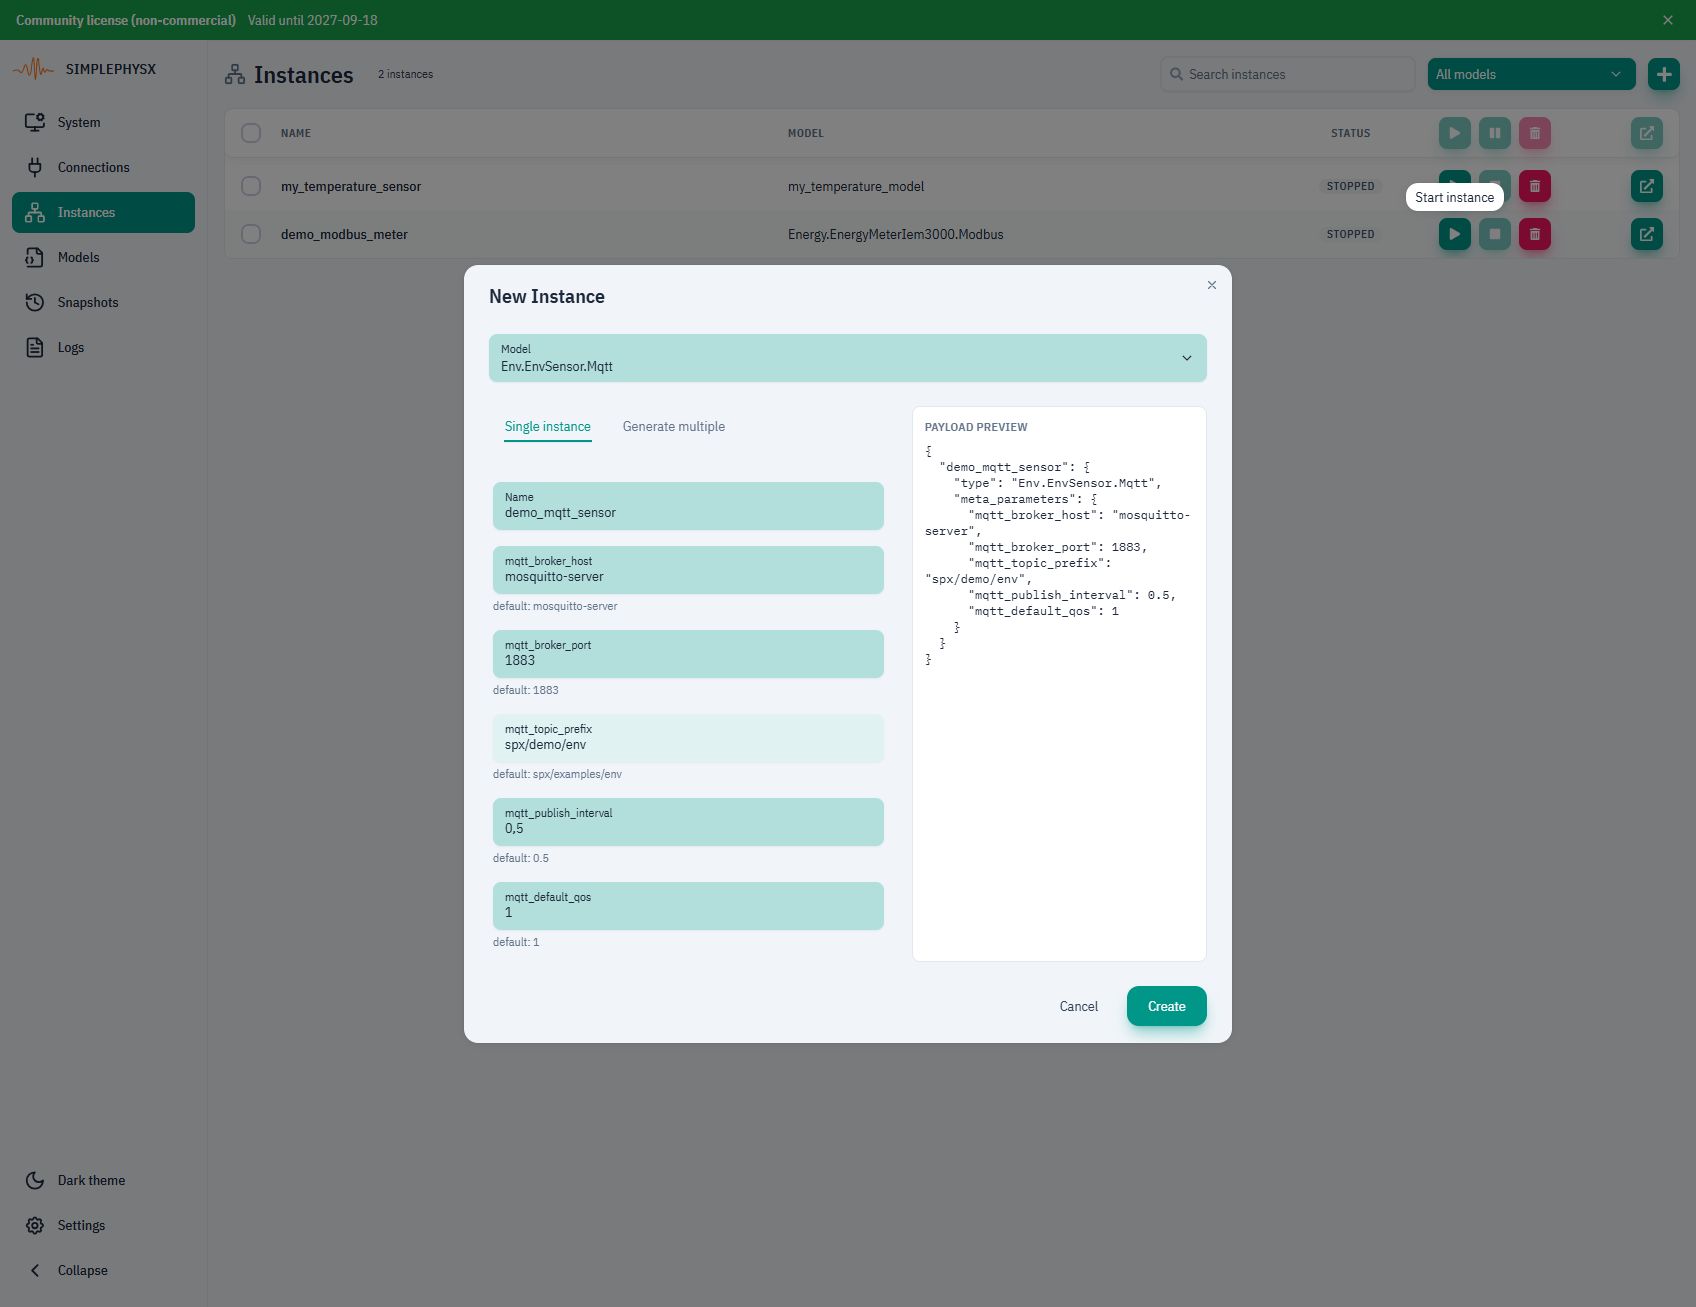
Open Instances → New instance. Select Env.EnvSensor.Mqtt, or your imported registry name. Use an unused name, such as demo_mqtt_sensor. Set mqtt_broker_host and mqtt_broker_port for your broker, and mqtt_topic_prefix to spx/demo/env. Choose Create, then Start instance. Confirm RUNNING.
Model not listed?
Download the library YAML linked above. In Models → Load model from file, import it under a registry name of your choice. Select that name in New instance. The dotted name in our screenshots is a registry label, not the YAML filename.
2. Connect and subscribe
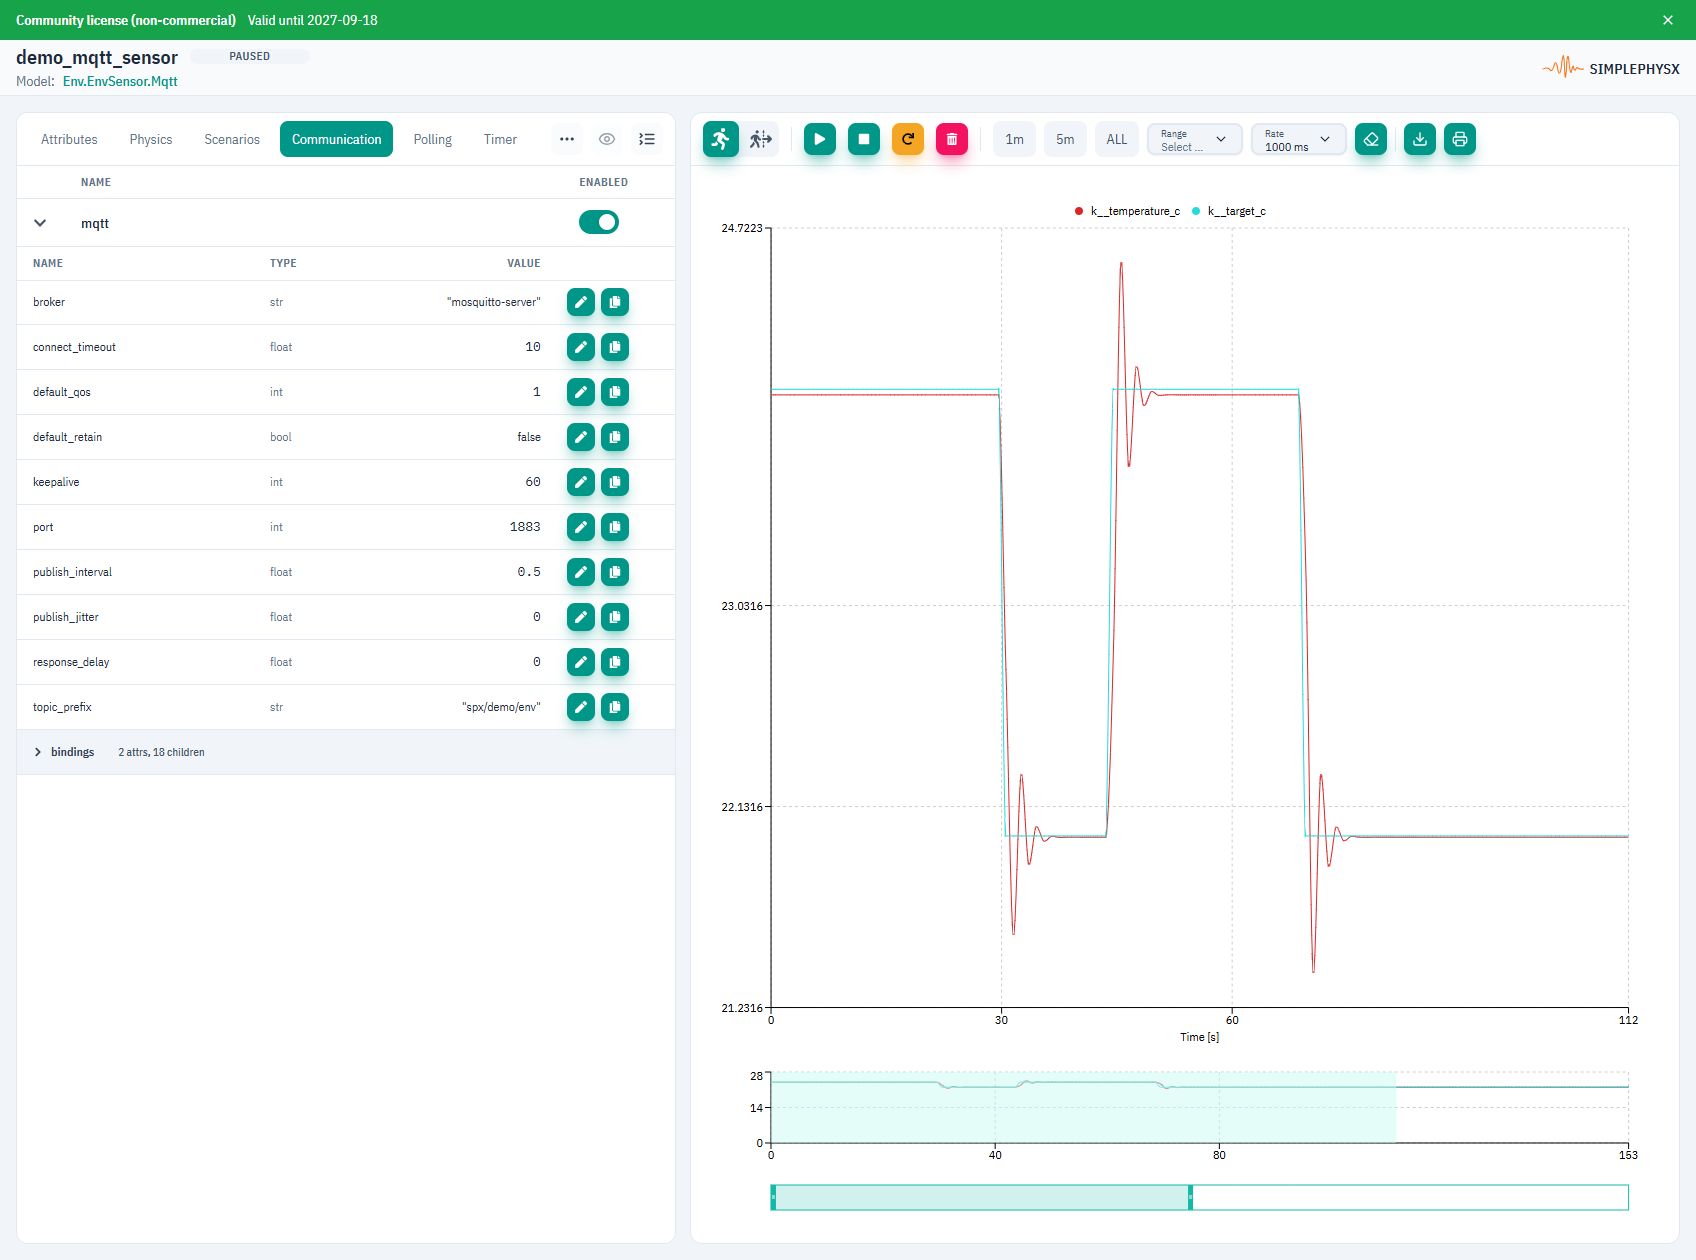
In Communication → mqtt, check the broker and prefix. Connect MQTT Explorer or your own client to the same broker, using an address reachable from that client. A desktop client may need the Docker host’s address and published port instead of mosquitto-server.
Subscribe to spx/demo/env/telemetry/# before sending a command. This example uses retain=false. Check: sensor readings arrive on the telemetry topics. The communication reference lists topics and payload formats.
3. Send a command and verify the response
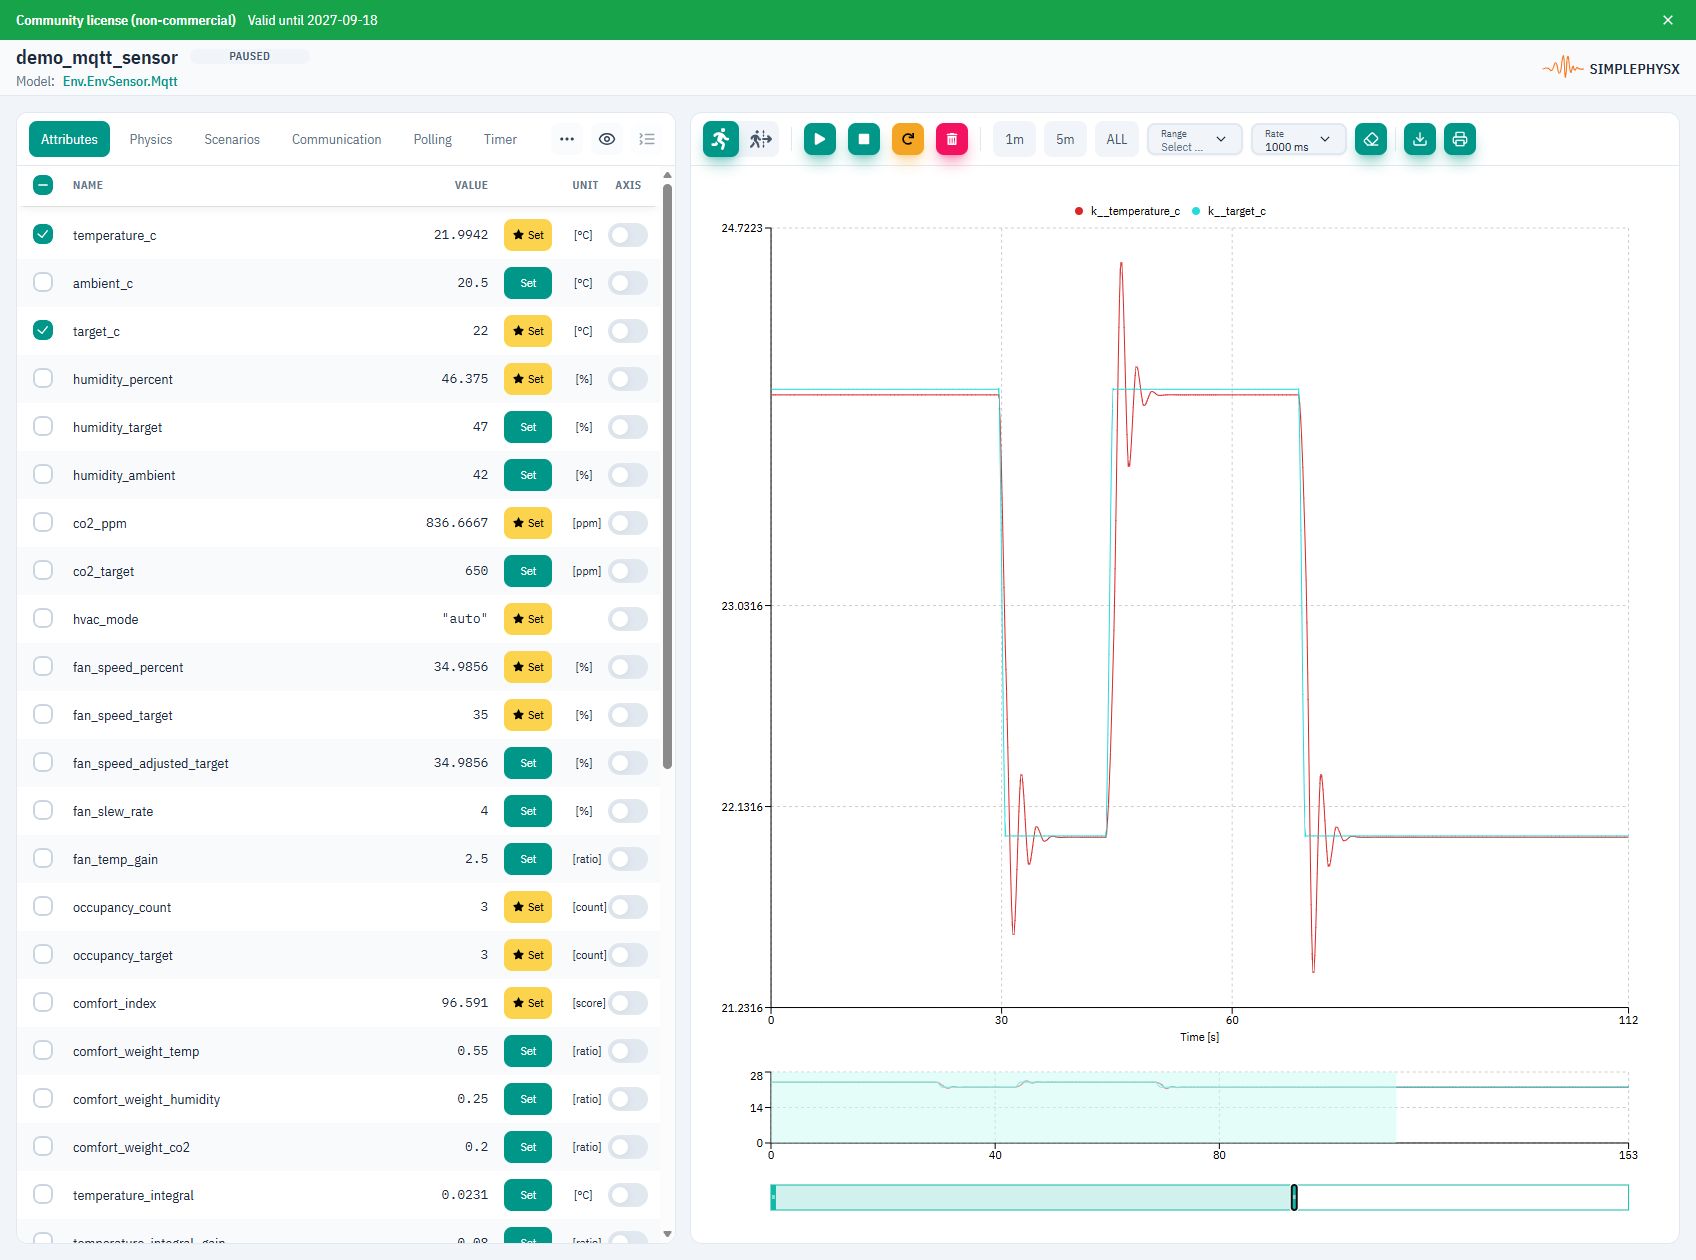
In Attributes, select temperature_c and target_c with a shared °C axis and 1000 ms chart rate. Publish plain text 24.0 to spx/demo/env/command/setpoint_c and watch spx/demo/env/telemetry/target_c.
Success: your client receives a target of 24°C, and the measured temperature responds over time. Send 22.0 to restore the initial target and verify the reply. After settling, pause to inspect the chart history.
When finished, choose Stop instance.
Protocol communication
Use these settings and messages with the library’s environment sensor model.
- Client / transport
- MQTT client → BROKER_HOST:1883; same broker as SPX
- Example prefix
- spx/demo/env (override); library default: spx/examples/env
- Delivery
- Model QoS 1; retain=false; subscribe before sending commands
Replace host placeholders with reachable addresses and use your published ports.
Swipe the table to see requests and replies.
| Address / message | Operation / payload | Expected reply |
|---|---|---|
spx/demo/env/telemetry/# | Subscribe to the full telemetry subtree | Separate topic/value messages, not a combined JSON object |
spx/demo/env/telemetry/temperature_c | Subscribe — measured temperature | Numeric UTF-8 text, for example 22.5; changes while running |
spx/demo/env/command/setpoint_c | Publish plain text 24.0 | telemetry/target_c on the same prefix → 24.0 |
spx/demo/env/telemetry/target_c | Subscribe — target readback | Numeric text; initially 22.0 on a fresh instance |
spx/demo/env/telemetry/humidity_percent | Subscribe — humidity | Numeric percentage text; for example 45.0; changes while running |
Values describe this model’s nominal setup unless noted. Live measurements change as the simulation runs.
Example request and reply
Keep the subscription open, publish 24.0, and verify target_c=24.0 plus a changing temperature_c. Publish 22.0 to restore the target.
SUBSCRIBE spx/demo/env/telemetry/#
PUBLISH spx/demo/env/command/setpoint_c  payload: 24.0
RECEIVE spx/demo/env/telemetry/target_c  payload: 24.0
PUBLISH spx/demo/env/command/setpoint_c  payload: 22.0
RECEIVE spx/demo/env/telemetry/target_c  payload: 22.0
No reply or an unexpected value?
- BROKER_HOST is the broker address reachable from your client. A container name such as mosquitto-server may work for SPX but not for a desktop client.
- Use your actual prefix on every topic. Send 24.0 as plain text, without JSON braces or extra quote characters.
- PUBACK confirms broker delivery; telemetry/target_c confirms device state. With retain=false, a late subscriber may miss an unchanged target.
What you can test next
- Send another target and observe command-to-state behavior.
- Run
mqtt_disconnectto test recovery after a disconnect. - Try different QoS and retain settings.
Using an AI agent?
Give your agent this page and the linked YAML. Resolve the model’s registry name and broker addresses from your environment. Subscribe before publishing; verify the reply through MQTT. Report the topics, payload and observed response. The model keys are k__temperature_c and k__target_c; the Attributes table hides the k__ prefix.
See the MQTT adapter guide for credentials and topic mappings.